Mavericks on the 2014 Mac mini
A few weeks ago, I bought a 2014 Mac mini with the intention of running OS X 10.9 “Mavericks” on it. The Mavericks installer USB, however, failed to boot, just showing the prohibitory symbol. This was a bit disappointing after I had already disassembled, cleaned, repasted, and reassembled the machine… It turns out that this Mac mini is only supported by OS X 10.10 “Yosemite” and newer, even though Mavericks fully supports its Haswell architecture.
Unable to find specific instructions, I spent a few evenings getting Mavericks to run on the Mac mini. The result is a lovely cool and quiet Mavericks machine. All the hardware seems to be supported: the iGPU, SATA, USB, Ethernet, Wi-Fi, and Bluetooth all work, though my Mac mini does not have a PCIe SSD to test. FileVault full-disk encryption is not supported due to the installation method I used[1].
Here’s a screenshot of OS X 10.9.5 on the 2014 Mac mini in all of its skeuomorphic glory: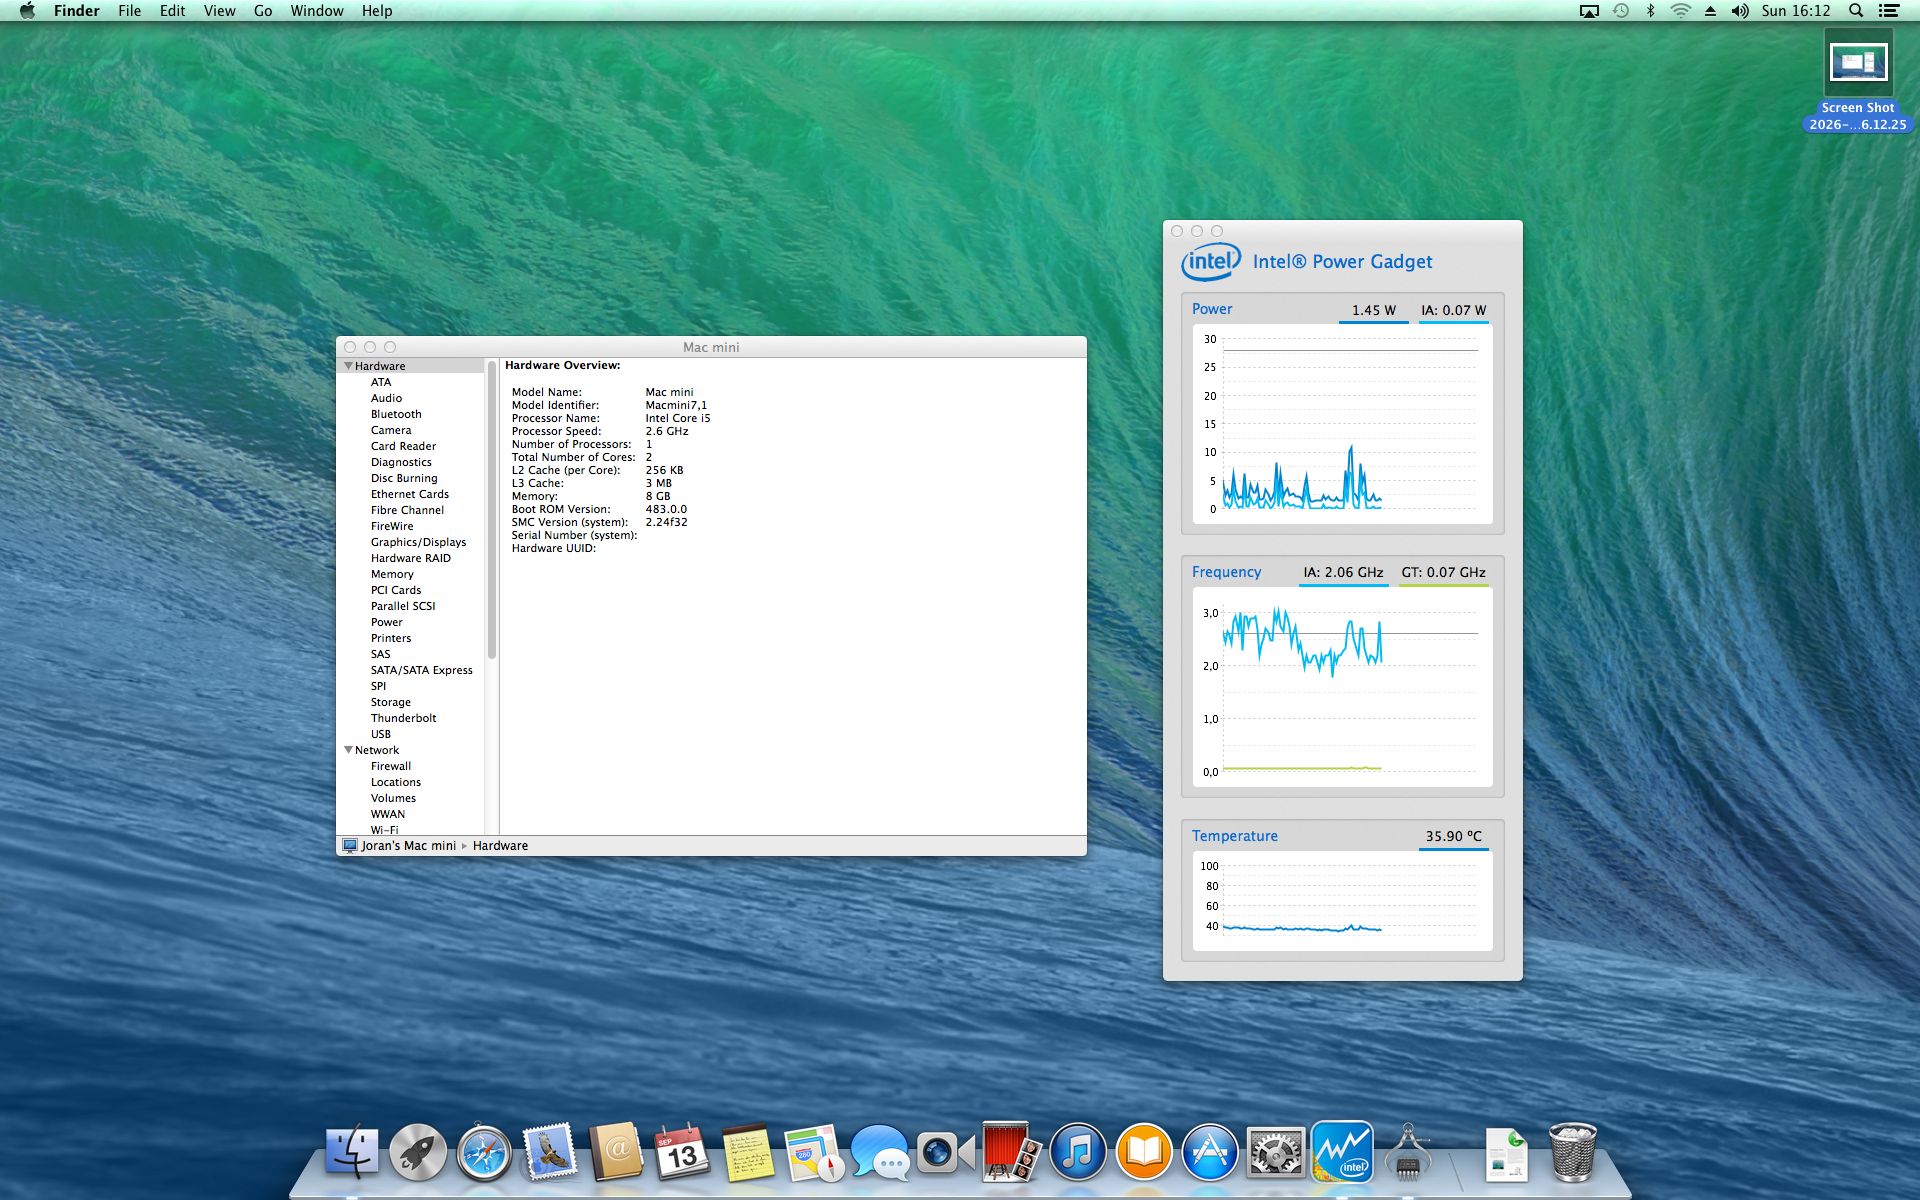
The rest of this post explains how to install Mavericks on the 2014 Mac mini. If you only want to patch an existing installation or adapt the required patches into an OpenCore configuration, you can skip ahead to the installation section.
Preparing the installer USB
You will need a USB drive to install Mavericks from and a copy of the Install OS X Mavericks.app for OS X 10.9.5. The version is important because the kernel extension patches in the installation section are specific to this version and may not work with other versions.
Ensure your USB drive has a GUID partition table; otherwise the Mac mini will be unable to boot from it. Turn it into a Mavericks installer USB by running the following commands[1], adapting /Volumes/USB to the mount point (or device path) of your drive’s partition:
hdiutil attach -nobrowse "/Applications/Install OS X Mavericks.app/Contents/SharedSupport/InstallESD.dmg"

sudo asr restore \
  --source "/Volumes/OS X Install ESD/BaseSystem.dmg" \
  --target /Volumes/USB \
  --erase \
  --noprompt

rm "/Volumes/OS X Base System/System/Installation/Packages"
cp -R "/Volumes/OS X Install ESD/Packages" "/Volumes/OS X Base System/System/Installation/"

hdiutil detach "/Volumes/OS X Install ESD"
The installer USB contains two platform support checks that fail on the 2014 Mac mini. The first check is based on the PlatformSupport.plist and prevents the installer USB from booting on unsupported machines. Add the board and model of the Mac mini to this file:
/usr/libexec/PlistBuddy \
    -c "Add :SupportedBoardIds: string Mac-35C5E08120C7EEAF" \
    -c "Add :SupportedModelProperties: string Macmini7,1" \
    "/Volumes/OS X Base System/System/Library/CoreServices/PlatformSupport.plist"
The second platform support check is inside the OSInstall.mpkg. It is used by the Install OS X application to disallow installing, and even opening utilities such as the terminal, on unsupported machines. Add the 2014 Mac mini board to this platform support check as well[2]:
cd "/Volumes/OS X Base System/System/Installation/Packages"

pkgutil --expand OSInstall.mpkg OSInstall.mpkg.expanded
rm OSInstall.mpkg

sed -i '' \
    's/\(var platformSupportValues=\)\[\(.*\)\];/\1[\2,"Mac-35C5E08120C7EEAF"];/' \
    OSInstall.mpkg.expanded/Distribution

pkgutil --flatten OSInstall.mpkg.expanded OSInstall.mpkg
rm -rf OSInstall.mpkg.expanded
You now have a Mavericks installer USB that works on the 2014 Mac mini.
Installation and hardware support patches
Install Mavericks normally and open a terminal at the end of the installation. If you accidentally let the machine restart, you can boot from the installer USB again and open a terminal then. Before continuing, you should adapt the commands in this section to your installation destination if it is different from the conventional /Volumes/Macintosh HD I’ve used.
There are two issues that prevent Mavericks from running on the 2014 Mac mini: a platform compatibility check and the Haswell iGPU driver, which does not recognise this machine. Bypass the compatibility check by setting the -no_compat_check boot flag in the NVRAM:
nvram boot-args="-no_compat_check"
Note that if you ever reset the NVRAM, this boot flag would need to be set again.
The Haswell iGPU driver in Mavericks, specifically the AppleIntelFramebufferAzul.kext, does not contain a framebuffer configuration matching the 2014 Mac mini. This prevents the driver from loading. To fix this, replace an unused framebuffer configuration with a configuration for the Mac mini which I’ve adapted from OS X 10.10.5:
perl -0777 -pi \
    -e 's/\x03\x00\x22\x0d\x00\x03\x03\x03\x00\x00\x00\x02\x00\x00\x30\x01\x00\x00\x00\x00\x00\x00\x00\x60\x99\x14\x00\x00\x99\x14\x00\x00\x00\x00\x00\x00\x00\x00\x00\x00\x01\x05\x09\x00\x00\x04\x00\x00\x87\x00\x00\x00\x02\x04\x0a\x00\x00\x04\x00\x00\x87\x00\x00\x00\x03\x06\x08\x00\x00\x04\x00\x00\x11\x00\x00\x00\xff\x00\x00\x00\x01\x00\x00\x00\x40\x00\x00\x00\x02\x00\x00\x00\x01\x01\x00/\x0d\x00\x2e\x0a\x00\x03\x02\x02\x00\x00\x00\x06\x00\x00\x20\x02\x00\x00\x20\x02\x00\x00\x00\x60\x99\x14\x00\x00\x99\x14\x00\x00\x00\x00\x00\x00\x00\x00\x00\x00\x01\x05\x09\x00\x00\x04\x00\x00\x07\x01\x00\x00\x02\x04\x0a\x00\x00\x04\x00\x00\x07\x01\x00\x00\xff\x00\x00\x00\x01\x00\x00\x00\x40\x00\x00\x00\x00\x00\x00\x00\x00\x00\x00\x00\x00\x00\x00\x00\x8e\x04\x00\x00\x00\x05\x05/;' \
    "/Volumes/Macintosh HD/System/Library/Extensions/AppleIntelFramebufferAzul.kext/Contents/MacOS/AppleIntelFramebufferAzul"
I also recommend adding a Mac-35C5E08120C7EEAF.plist adapted from OS X 10.10.5[3] to the X86PlatformPlugin.kext for improved processor frequency scaling and sleep behaviour. This fixes the X86PlatformShim::start - Failed to send stepper error as well. I’ve made two variants of this file: one for the base model with a 15W TDP processor and another for the 25W TDP processor models. Choose the appropriate one for your machine. The 15W TDP processor variant is untested as I do not own a base model Mac mini.
cp \
    Mac-35C5E08120C7EEAF-*.plist \
    "/Volumes/Macintosh HD/System/Library/Extensions/IOPlatformPluginFamily.kext/Contents/PlugIns/X86PlatformPlugin.kext/Contents/Resources/Mac-35C5E08120C7EEAF.plist"
If your machine has a third party (non-Apple) SATA SSD, you can enable TRIM support for it:
perl -0777 -pi \
    -e 's/\x41\x50\x50\x4c\x45\x20\x53\x53\x44/\x00\x00\x00\x00\x00\x00\x00\x00\x00/g' \
    "/Volumes/Macintosh HD/System/Library/Extensions/IOAHCIFamily.kext/Contents/PlugIns/IOAHCIBlockStorage.kext/Contents/MacOS/IOAHCIBlockStorage"
The kernel extension caches will need to be updated in order to prevent Mavericks from trying and failing to boot with the original unaltered kernel extensions:
touch "/Volumes/Macintosh HD/System/Library/Extensions"
kextcache -update-volume "/Volumes/Macintosh HD"
You can now restart your Mac mini into a fresh Mavericks installation. Happy retro computing!
A note on updates
If you install updates, you may need to apply the kernel extension patches again. I encountered this after installing the Security Update 2016-004, which replaces the This method of creating an installer USB allows modifying files which would be protected by signatures on a medium created using the Fun fact: the The sleep policy was taken from the other Mac minis’ plists in the OS X 10.9.5 IOAHCIFamily.kext and AppleIntelFramebufferAzul.kext with updated versions. Interestingly, I was able to reboot into my Mavericks installation after this update, albeit with software rendering and without TRIM support. This is in contrast to the base OS X 10.9.5 installation, which required the Haswell iGPU driver patch to boot into the setup assistant. Applying the same patches and rebuilding the kernel extension caches after the update restored full hardware support.createinstallmedia script. Another benefit is that it avoids expired certificate issues. It will however install OS X without a Recovery HD partition, which prevents use of FileVault FDE. ↩ ↩2OSInstall.mpkg patch used here is similar to that used to get the Mac OS X 10.6 “Snow Leopard” installation DVDs for the 2011 iMac and MacBook Pro to work with the 2011 Mac mini. This Mac mini, specifically the model with AMD graphics, is a great Snow Leopard machine. Apple seems to have had a habit of releasing some Mac minis just out of support from their most loved operating systems, despite the hardware being compatible. ↩X86PlatformPlugin.kext instead of being adapted from OS X 10.10.5. This is because all Mac minis have the same sleep policy in both OS X 10.9.5 and 10.10.5 but the sleep policy formats differ quite a bit between those versions. ↩